Monday, January 31, 2022

CraftyHazelnut's Patterned Paper Challenge: February Design Team Project

Ok, let's get out that patterned paper and see what gorgeousness we can make today. With this project, I really wanted to remind myself you can alter patterned paper just like you can card stock. So, for the sentiment the scalloped patterned paper behind it I dry embossed using a Sizzix embossing folder I had in my stash. I need to remember that patterns can be changed just like any other paper or card stock. So don't be afraid to stamp on your PP, use your stencils, or anything in your imagination.


If you want to join the fun over at the Craftyhazelnut's challenge just head on over here.

As usual, I also have a video describing the process of putting this card together.  You can find that here.

Sunday, January 30, 2022

Valentine's Post-it Note Holders, Part 1

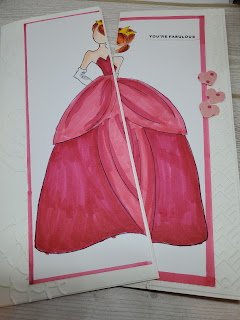
 Took this idea from Angela Leach. You can see her entire video here.


I am making these for some co-workers as a way of thanking them for their hard work each day. This short is showing you just the assembly of the holders. Part 2 will show you how I decorated them along with putting in the actual post-its. Hope this inspires you to get crafty today.

Tuesday, January 25, 2022

Simple Birthday Card with Minimal Supplies


A few supplies, cardstock, ink, a hole punch, and some stickers means you can make a quick cute Birthday Card. I hope you enjoy this short video showing how easy it is to put together a birthday card when maybe you need one on short notice. I kept the card design clean and simple. Enjoy!


Sunday, January 23, 2022

Yesterday's Play Time Results

So yesterday I did something a bit different.  I did a live on my TikTok account (first one) and made some embellishment clusters for lack of a better word.  I think I had one person watching...just for a little bit.  It was good and I am glad it was just one person in my first live.  But, then I was on a roll, so I took a little break.  Then, I went on Instagram Live and turned those 5 embellishments into cards.  So of, course, I had to share these here as well.

Most of the products came from the Spellbinder's Card Kit from July 2021 "Damask Dream".  I did pull some other things out of my stash as well such as washi, bling, some other die cuts, and sentiment strips I had on hand.  This was just relaxing play.  I hope some of these inspires you.

The live on Instagram is in my profile there if you want to watch it.  My username there is @Samanthadesigns2.
 

Saturday, January 22, 2022

Stitched Heart Card 2: Stepped UP

I did a short showing how to do this simple stitched heart. See this video: I then used one of my stitched cards to make a pretty simple card, great for a beginner: See this video:


Today I stepped it up a bit adding a die-cut frame colored with distress oxide ink and gold specks (thanks to some gold watercolor paint). I added some patterned paper and in no time had a card that was stepped up a bit. Hope you enjoy watching this come together.


Friday, January 21, 2022

Stitched Heart Card 1 -Beginner Level Cardmaking


 This is a sample of a cute fun card a beginner could make with that super simple stitched heart I showed you. You just need a bit of extra card stock, some washi. If you want also add a sentiment on the inside as I did if you have a sentiment stamp. You could also add a sticker sentiment as well if you would rather. Use what you have! Hope this inspires you!

To see how to make the stitched heart see my prior post.


Thursday, January 20, 2022

🧵Stitched Hearts on Cardstock


Yes, you can add 🧵stitched pieces to cards. I made two of these lovelies for cards just in time for Valentine's day. Want to see the cards I made with these? You'll have to check out my channel in the coming days to see how those turned out. For this, I used a heart-shaped die to trace out on some cardstock. I used a poking tool to add the holes as evenly as possible around the perimeter of the heart. With ombre pink thread I then added the stitches coming up through the hole around the perimeter and down through the center. Love it! 💖 This is also simple enough for a beginner. I hope you will try it out for yourself.


Sunday, January 16, 2022

Challenges Card, Clean and Simple🤨


 I haven't joined any challenges in a while. Today I found two I wanted to combine. I am entering this card in the Freshly Made Sketches # 518

and the Just Us Girls Challenge # 616

Color Week
(light blue, silver, and white). This is a super simple card but I liked how it came together with all the elements. I used a homemade stencil I made quite some time ago using Cricut Design space along with Salty Ocean Distress Oxides. I added a silver frame using recollections cards stock. Two square stacking dies helped to create my frame. Also from my die stash, I found this cute coffee or tea carafe. At least I think that is what it is. 🤨 I colored that with a couple of Copic markers then added a flower brad in the middle. Super simple but cute! 😍


Partial Die Cut Magic: Creating a Semi-Shaped Card


 I added a nice heart topper to today's card using partial die-cutting. I had some 4 x 4 card blanks made from another project but wanted something a bit "extra". So I used a heart layering die to cut out the top portion in the heart shape using the partial die cutting method. This cuts down the area you have to write on on the inside of the card but you still have plenty of room for a short note. I used some of my scraps from my scrap bin (part of my New Year's Resolution for 2022). So, glad I rummaged through that bucket instead of looking for a whole piece of cardstock. To finish off the card after layering the other pieces of card stock I added a couple of pieces of washi tape. Stamped the sentiment in Momento's Tuxedo Black ink. For extra sparkle, I added some holographic pink sequins. I have a couple of valentines I plan on sending these cards to. Who are you sending Valentine's to this year?


I have a short video as well if you want to check it out.


Saturday, January 15, 2022

Simple Painted Card with Just a few Products


 If you need a simple card..you can make one with just a few supplies. This one focused on using acrylic paint. I used a top from a water bottle and the side of a gift card to make this graphic card that could be used for any occasion. I added a simple die-cut and layered everything on a pink A 2 size notecard. It is simple. It is cute. It is done in just a few minutes.


Monday, January 10, 2022

Don't Want to Color Your Stamped Images? Try this instead.


If you have coordinating dies you can use them to "color" your images. I used some kid's craft foam to lay down the color for this tree on my tag. Now it isn't a perfect stamping but I really wasn't going for that look. I also recommend after doing this to consider cutting out two of the images and stacking them on top of each other. This will give you a bit more cushion so you won't get ink elsewhere on your project. You live and you learn. I then used the outline stamp to stamp the image. Another tip is when you cut the foam in your die cutting machine only roll it through once. If you go back and forth the foam will just be flattened even more.


Sunday, January 9, 2022

Using Large Images to make Slimline Cards


 This beauty was colored last year during the 30 day color challenge. But how was I going to use her?....well of course, in a card. However, even a 5 x 7 would not work. So I split her in half and made 2 SlimLine Cards. It worked wonderfully. I kept the backgrounds simple with some white diecuts to add some interest/texture. To see these two cards being made head-on over here to my YouTube channel.