Monday, February 28, 2022

March Design Team Project for Craftyhazelnut's Patterned Paper Challenge


I love cards that look like a stitched quilt. I just can't seem to make one. But I am trying again today. Practice makes perfect, right? I am using some patterned paper from my stash, Colorbok, and The Paper Studio. I have had both of these for quite some time so I doubt they would still be available, but if you want to try this out yourself (because it isn't hard) then use what you have on hand. The flower dies worked wonderfully. I of course used a Sharpie pen to doodle on them to make them a bit more whimsical. For the "stitches" I used a white gellyroll pen. This wasn't hard to do but for some reason, I struggle anytime I am trying to make something that looks like a quilt pattern even this. Hope you find some inspiration.


Join in on the fun by heading to Craftyhazelnut's Patterned Paper challenge here.


Yes, I do have a video you can find that on my YouTube Channel here.

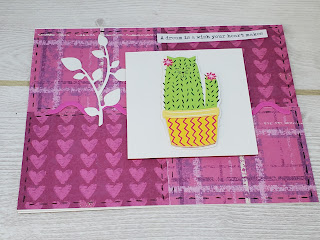
Also here is another card I made while testing this out to see if I could manage to pull this one together or not.  


Saturday, February 26, 2022

Glitter in Acetate Adds Wow


I recently did a short on adding glitter to a laminating pouch to make sparkly acetate, if you will. Today I used one of those pieces on this simple card using scraps I had out on my desk. I had a blended background on my desk for the longest time that I wasn't sure what I was going to do with. It was one of those things I had completed then went...oh hmm now what? Do you ever have those types of moments in your crafting? So I put the two together. It took two things that were ok on their own and made them stunning. So to finish off the card I added some of the cutest Dollar Tree stickers I have ever seen along with a simple sentiment by Lawn Fawn with gold embossing powder. This is going to be one of those cards I am going to have to send to someone very special.


Wednesday, February 23, 2022

This Challenge was a Challenge

 I love following challenge blogs and entering when I have a moment.  But this Just Us Girls Color Challenge #620 ended up being harder than I thought it would be.


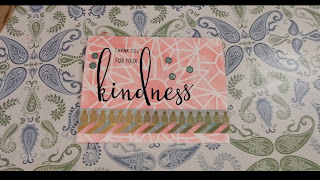
I knew where I wanted to start I had a teal-ish background I had made on one of my latest TikTok lives.  I thought no problem just add some brown and orange elements you are done. 


Well, I just couldn't seem to get something that I thought would go together.  So I ended up adding a panel I colored with an orange Sharpie, I added a bit of definition with a brown frame on that with a brown Sharpie.  (Talk about getting back to the basics...I know right?)  I still wasn't happy so I ran it through my Big Shot with an embossing folder.  Ok, now I am getting somewhere.  The sentiment I added in StazOn Timber Brown.  I just got this sentiment set from CZ Design called Clean Line Everyday.  It is becoming my favorite quickly.  It just needed a bit more something so I spied these glitzy brads I have had forever so I stuck that on as well.

Is it the best card I have ever made...no.  But I really do like the end result.  Thanks for the stretch Just Us Girls! 


Using those Scraps and Adding Gilded Flakes


 One of my resolutions this year was that I would make sure to use scraps from my scrap bin one card a month at the minimum. Here is February's card. I used some scraps that measured about 1 1/2 inches by 5 1/2 inches. I placed them on a piece of cardstock covered in double-sided adhesive. I left gaps on purpose and added gilding flakes to the rest of the exposed adhesive. I added a few other elements including a sentiment I made using Cricut Design Space. It was cut out using my Cricut Explore. This only took a little time. So, I ended up making 3 more cards. To see those beauties you can see them below Hope this inspires you!


Monday, February 21, 2022

Adding Color to Neutral Embellishments

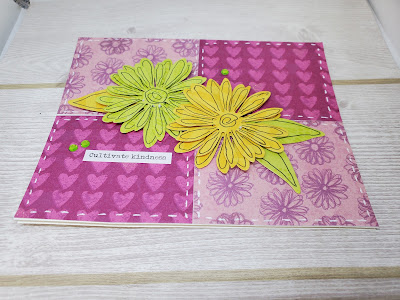
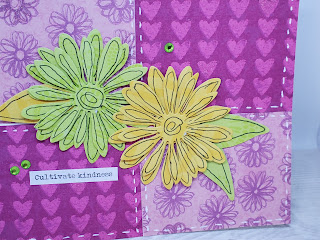
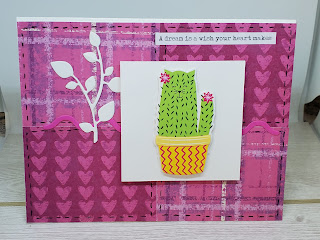
 When picking up embellishments from Dollar Tree..always get some in white. You can color them later to match your project pretty easily. Here I used Distress Oxide ink, but you could also use dye inks, alcohol markers, or maybe there are some other things I haven't thought of. Let your imagination take your projects to the next level.


Sunday, February 20, 2022

Trying Deco Foil Transfer Gel Duo for the First Time


Wanted to share the outcome of my first use of the Deco Foil Transfer Gel Duo. I think it went really well. I used it on a live over on Tik Tok last weekend. I applied the paste to my card base using a stencil. I let it dry overnight. In this video, I run it through with foiling sheets in the Mini Minc Machine. I am really happy with the results. If this is something you have been eyeing I would recommend it. Below is the video showing you the results.


Friday, February 18, 2022

Washi, paint, and Dollar Tree Stencils for a Quick Birthday Card


 I had a blast using some new stencils I picked up from Dollar Tree. I used acrylic paint then created splatter. The splatter was to cover up some mistakes I made while making the stenciled sentiment. Washi tape I used to create a frame. The whole panel was then given a bit of dimension with foam tape. This is so simple and great for a beginner card maker. I can see myself making quite a few of these either with stickers, stamps, and stencils.


Thursday, February 17, 2022

Busy Background


🎀 Sometimes you just need a focal point to tone down that busy background.  I love these stickers I picked up from the Dollar Tree.  It was exactly what I needed to tone down this attempt again of a quilt like background.  I really must keep practicing. Check out the video here.

Sunday, February 13, 2022

Keep it Simple : Challenge Submission


Some of the cutest cards I make and see are just totally simple. I decided to keep it simple with this card I am entering into the
AAA Card Challenged # 208
. The challenge was a color challenge of using Black and White along with 1 other color.


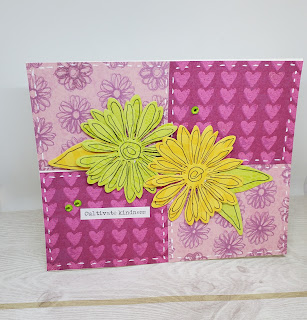
These daisies had leftover from another recent project were screaming to be used. So they became the focal point of this card. The Hello sentiment is a washi tape with hi and hello repeating as the pattern. I hope you are able to join the challenge as well. There are several more days left to join.


I also have a video to check out on my YouTube channel. You can find it here.

Saturday, February 12, 2022

Alter Pattern Paper: Emboss Resist


All those wonderful techniques we do can also be applied to patterned paper. Though we often don't. I am committing to exploring a bit more techniques on all the patterned papers I have. Believe me, I have plenty. This time I did a bit of emboss resist. It is amazing how the dandelion when it was applied to the paper seemed to line up perfectly with the pattern. I really enjoyed how well this worked.

Thursday, February 10, 2022

Keep it Simple with a Single Layer Card✨


A stencil, some ink, stamps, and a few embellishments can give you a quick card. It won't be ordinary either.✨ You can watch the video below for more information. I am entering this card into Happy Little Stampers Stencil Challenge Anything goes and Creative Fingers Challenge #224 Anything goes.


Saturday, February 5, 2022

4 Bar Card: Why it is a great size.📏


I don't make a lot of 4 Bar Cards...but I really should. The best part is you can have elements hanging off the card and it will still fit in your A 2 envelopes. You should give this card size a try if you haven't.


Wednesday, February 2, 2022

Valentine's Post It Note Holder, Part 2


 It's time to decorate the Post It Note Holder I showed you in my last video. You can find how to put the base of the holder together here.

Today I thought I would show you the easy decorations I am adding. The flower stamp came from Spellbinder's Card Kit of the Month, July 2021. You could use anything in your stash. I kept it pretty simple. I am also using Cricut red glittered cardstock as the layer since I have lots of this on hand.

Go forth and craft my friends!