Blog Background

Showing posts with label dry embossing. Show all posts

Tuesday, June 6, 2023

Adding Embossed Details Without an Embossing Folder


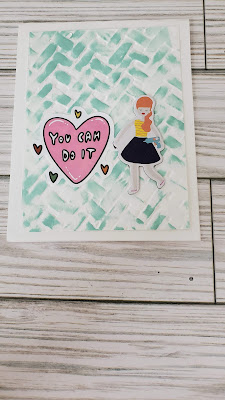
So, if you are a beginner cardmaker, this is one of those cards for you. If you have something you can score on with a scoring tool, then just make some lines. You can make an easy card in minutes. This is a great card making technique for all. This simple handmade card used a bit of scoring with something to define the area. I used dollar tree flat backed pearls. I love this clean and elegant look. It really could be used for anyone or any occasion. Since I used a sticker for the sentiment, I really did not have to get out many tools at all. I hope you will give this a try.

Thank you for stopping by my blog. I hope you find things that inspire you. I love this hobby so much, so I enjoy sharing my cards with all of you. Hope to see you all soon. Be sure to check out my links below for where to follow me besides here. If you wish to support this channel even more, please see the buy me a coffee link on the right hand side. Have a great day! Happy Crafting!

As always there is a video found here.

Thursday, June 1, 2023

Stretching the Tools We Have: Adding Ink to an Embossed Image


Embossing folders are pretty good value for money. But the best thing about them is that they are so versatile. Today I want to show you another card technique that you can use with those embossing folders. Adding a bit of color after you run your cardstock through your die cut machine in the embossing folder helps you stretch that supply just a bit more. Just adding that bit of ink to your embossed image really does make a difference. I hope you will try this card making technique soon so you can make your own handmade card.

Thank you for stopping by my blog. I hope you find things that inspire you. I love this hobby so much, so I enjoy sharing my cards with all of you. Hope to see you all soon. Be sure to check out my links below for where to follow me besides here. If you wish to support this channel even more, please see the buy me a coffee link over on the right hand banner bar. Have a great day! Happy Crafting! You can check the video out here for this card.

Tuesday, October 4, 2022

Sun Ray Card

I loved using this embossing folder to make a 🌞 ray card (that's what I am calling it). It just added that bit of extra texture.   

Wednesday, February 23, 2022

This Challenge was a Challenge

 I love following challenge blogs and entering when I have a moment.  But this Just Us Girls Color Challenge #620 ended up being harder than I thought it would be.


I knew where I wanted to start I had a teal-ish background I had made on one of my latest TikTok lives.  I thought no problem just add some brown and orange elements you are done. 


Well, I just couldn't seem to get something that I thought would go together.  So I ended up adding a panel I colored with an orange Sharpie, I added a bit of definition with a brown frame on that with a brown Sharpie.  (Talk about getting back to the basics...I know right?)  I still wasn't happy so I ran it through my Big Shot with an embossing folder.  Ok, now I am getting somewhere.  The sentiment I added in StazOn Timber Brown.  I just got this sentiment set from CZ Design called Clean Line Everyday.  It is becoming my favorite quickly.  It just needed a bit more something so I spied these glitzy brads I have had forever so I stuck that on as well.

Is it the best card I have ever made...no.  But I really do like the end result.  Thanks for the stretch Just Us Girls! 


Wednesday, February 1, 2017

Rocking the Glitter Cardstock

Hello everyone!  Not been on the blog here much the past month.  I have had some family things going on so creating and getting into my crafty supplies has taken a backseat.  Life just happens sometimes.  

For those who check things out here on my blog, I thank you!  I love comments and checking on the  traffic.  I doubt I will ever be professional blogger, nor do I see myself being the blogger with all the latest tools.  I am just you average papercrafter who yes, spends too much money sometimes on her craft but also is probably the last person to get the latest gadget.  The longer I am a papercrafter I realize that I don't have to have all the gadgets.  I just need to get in there regularly to create with the "stuff" I have.  It makes me happy.  So I hope you are happy stopping by today.

Today I wanted to share with you a couple of Thank You cards I made.  I started with the latest CASE(E) this Sketch challenge as inspiration.

First here are the cards:  
And here is the sketch:    It isn't an exact copy but I am happy with the results.
The card base is 5 1/2 x 4 1/4 in cream.  All the papers are Recollections brand by Michaels.  The thank you sentiment and flower I cut using my Cricut.  I used glitter cardstock as the next layer.  The next layer I cut using a Papertrey Ink die.  The card on the right I used my swiss dot embossing folder to give it a bit more texture.

I always find it a challenge getting glitter cardstock to stick down and to get other layers to stick to it.  So I brought out the heavy guns in the adhesive department.  I used Tombow Extreme and Ranger's multi medium in matte.

Now got to take the time to write in these to get them off to those folks who have been so kind to me in the last few weeks.

I am entering the cards into CAS(E) this Sketch # 206 and Creative Craft Cottage #80 must use flowers.  I hope you enjoyed!

Sunday, May 10, 2015

You have made a difference

Happy Mother's Day everyone!  For each of you mother's out there, just remember you have made a difference!

I started this card with the Mojo Monday Sketch # 396.   This is a great sketch.  My base was 4 1/4 x 5 1/2 in white.  I added a panel of double sided card-stock by K&Company's Tim Coffey collection.  I cut a triangle out and turned it to the opposite side.  The Recollections white panel is dry embossed with a cuttlebug folder.

The sentiment is by Unity Stamp Company.  I layered that on a die cut shape using my Cricut. I inked the edges with Stampin' Up's Pacific Point.  This section I popped up on Recollections Foam Squares.

For a final touch I added some twine and layered buttons.


I got a lot of stamping done this weekend, which is always fun.  Can't wait to share it all with you.  Once I remembered, Mother's Day, I did get off a quick and simple card to my mama.  So sorry, I did not get a chance to share here, but, I will try to get another copy done.  I will post it so everyone can see.  Have a great day!

I am entering this card in:
Mojo Monday Sketch # 396
Sparkles Monthly Challenge: Ribbons and Buttons
Creatalicous Challenges: Emboss
Craft Your Passion:  Anything Goes

Thursday, February 19, 2015

Welcome Baby!

I made this card for a co-worker at work.  I hoped she liked it.  I used my cricut machine to cut a circle out of the card front.  I then ran it through my bigshot using a cuttlebug folder to make those amazing dry embossed dots.

I added some green dotted paper to the back and then put on that cute onsie that I cut out using my cricut machine.

Finally after I cut out the Welcome Baby sentiment with my machine I covered it with Versamark ink and sprinkled it with silver Wow embossing powder.  To finish it off I added a few sequins here and there.

This came together pretty quickly. Definitely could make a batch of these to keep on hand.

I am entering this in Cuttin and Stampin Challenge: Anything goes
and Card and Scrap: Anything Goes

Sunday, January 4, 2015

Live it Up Mojo Style

It's time for another Mojo Monday inspired project.  This one took a while to "gel".  I would start and then didn't like where things were headed.  Then, I would leave the project on my craft area for awhile and come back to it.  Though, it actually took 2 days to complete...I totally love it now.

The papers are from Recollections and Papertrey Ink.
The stamps are from Studio G, including the sentiment. I can't believe I have never used this sentiment before.  It is so cool.
I made the candy dots....that's right made them.  I can now have candy dots in any shade I want.  And it's all thanks to this post by The Frugal Crafter.  This was the finishing touch to this project and I am so glad I took a moment to do this.  It just took it to another level.
I used a LifeStyles Crafts dry embossing folder on the pink strip behind the star.  The star is cut out with a Papertrey Ink Die.  The stars are stamped using Ranger Distress inks and the sentiment with Staz On Black.  The Sentiment is stamped on a die by Sizzix.  The entire die was too large but I just cut the top and bottom off and ended up with the perfect cut-out for my sentiment.

I just love this card!  It's one of those cards you are glad you left out on your craft table to just look at.  It makes me happy!  

I am entering this in the Mojo Monday 387 challenge, in time this week, since I missed the cut off for last week by 20 minutes.  Argh...hate it when that happens.  If you didn't see my card for last week you can find it here.  

Sunday, November 30, 2014

Circles and Snowflakes


This is a very simple card with lots of layers.  I used this weeks Mojo sketch and the colors from the Color Throwdown Challenge.

The patterned paper and the cardstock is all from Recollections.

I used a Sizzix die to cut out the snowflake and then added diamond Stickles to make it shine.

The dry embossed layer is also by Sizzix.

I added a stamped layer that kept the circle theme going using Versamark ink.  The stamp is by Technique Tuesday.
This card is entered for the following challenges:

Mojo Monday 373:  Mojo373
Color Throwdown:  ctd320
4 Crafty Chicks Challenge Blog- Die Cuts:  4CC #222

Tuesday, October 21, 2014

Thank You...with Sparkle

 Sometimes you just need a little extra sparkle in your card.  That is the thought that started me on the journey to this card that I made to thank my sweet employees for the beautiful flowers, thoughtful card, and yummy goodies that were part of last weeks Boss's Day. 

Now I wanted to try my hand at this.  However, that project did not turn out well. I kept tearing the paper.


However,  this card began with that wonderful sparkly thank you die by  Papertrey Ink from the beautiful  American Crafts Sparkle paper pack in the shade of blue.

I also knew I wanted to use my black and white paper straws I found in Target's Dollar Spot which got me thinking about a banner.

So first I found this pin I had pinned on pintrest, and though it isn't exactly the colors I ended up using, it is where I began.

Then, I looked for the sketch I wanted to use.  I found that also on pintrest searching for cards with banners.  Here is the sketch I used...

I turned it and moved the placement of the circle.  Finally, I was getting somewhere.


I like how the card turned out.  The image is Studio G stamped in pink Ranger distressed ink.  The banner I dry embossed using a Cuttlebug folder.  The patterned paper is from Recollections Tattered and Worn Collection.  The red paper is also by Recollections.